Wednesday, September 22, 2010

Willow Bloom, the latest moku-hanga creation

About a month ago, our desert garden decided to reward us with some color. This "desert garden" used to be referred to as "the back-40". When we first moved in we gracefully called it "raw desert" and it was near five years before we got around to planting some desert hardy plants, shrubs and trees.

Fast forward another five years of planting, moving, about a mile of drip irrigation trenching, pipe, hoses and drip heads...and VOILA! A beautiful desert garden with flowering trees, sage, and other assorted Mojave native and Mojave hardy plants.

The willows, my first tribute to the garden, bloom all summer and recently in early fall. Here is my tiny willow bloom:

Mojave Willow 2010 Copyright Maria Arango
 And the blocks that went into making of the willow bloom, sans words:


That's about it! I'm on to my second garden creation, the beaver tail blooms! This time my key block will be cherry which will allow me to do a more detailed line guide. Of course this will also raise the "degree of difficulty" for registering the key blocks but I think I'm ready.

Thursday, September 9, 2010

Last but not least, the hanshita paper transfer for woodblock printmaking

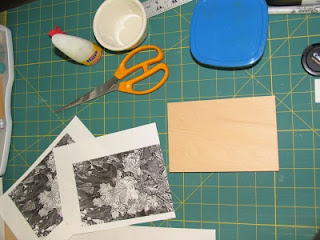
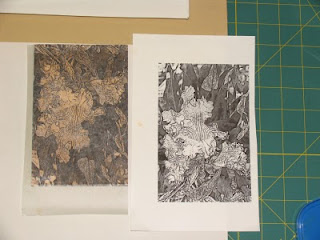
As I mentioned earlier, hanshita paper is simply a tracing paper that has been glued temporarily to a heavier stock paper. This allows the paper "sandwich" to be printed on any ink-jet printer and the tracing paper to be glued to the block without wrinkling or buckling.

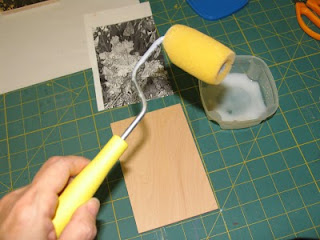
The hanshita printout is perfect with all the detail intact. The needed tools are some rice paste or wall paper paste (anything that is removable later with water), and a sponge brush or, my preferred method, a sponge roller.

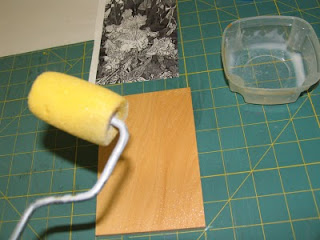
These rollers make quick work of the task of spreading a perfectly even layer of rice paste over the block. They come in all sizes!

There it is, a nice even light layer. I found the compromise between too much paste, which makes the tracing paper tough to remove later, and too little paste, which causes the tracing paper to peel off during carving. Sometimes it peels off before I am done carving details and I'm left to guess where the stem of the flower should be.

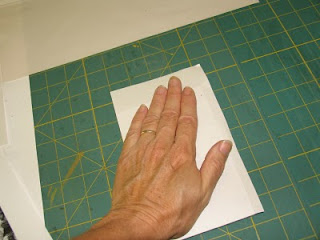
I just hand press the paper onto the block after aligning it carefully. I smooth it down evenly but not too much so as not to disturb the tracing paper.

The heavy backing paper is easily removed either while the rice paste is still a little wet or later after it has dried some. I have found no difference regardless of when the backing is removed.

If the ink was not dry on the paper for very long, it will actually transfer nicely to the block. The tracing paper can be rubbed very gently and removed leaving the ink-jet transfer on the block. I'm almost always too scared to do this so I just let the tracing paper dry under some weight to prevent any buckling. The carving can then proceed right through the paper.

The hanshita method yields perfect design transfers every time, which is why I use it most often on smaller works.

Lastly, a side by side by side comparison of the three transfer methods, the Studio Paper on the left, the ink-jet t-shirt iron-on in the middle and the hanshita on the right. The untransferred design is shown below each block.

I tint and oil the block a bit before carving and they all took ink and oil similarly except the iron-on transfer did not let the oil seep into the block. The block still carved fine right through the rubbery layer but, despite a perfect transfer, I probably won't use it because of that. Either of the other two methods works well, with the Studio Paper giving a slightly "freer" feel to the block since there is no paper adhered and the hanshita winning the detail-transfer race since the tracing paper gives slightly better contrast.

Transfering design to block with Iron-on T-shirt transfer

Here is the printed iron-on transfer stuff. The printout showed all of the fine detail with very good contrast so I was encouraged.

The detail of this transfer was probably the best of the three because of the high contrast.
Bring on the heat! I used an iron that's perhaps older than me...well, maybe not. This method needs a high heat setting and no-steam setting. I keep this old fashioned plain iron in the studio for just this type of project.
It takes some pressure and quite a high setting. My mini-iron (used for crafts) did not work; had to be a full-size iron.
The process of transfering with this method also "tanned" my block so no tinting would be necessary later.

The drawback is that the transfer is a rubbery ink designed for t-shirts, so there is quite a bit of relief that transfers to the block. It scrapes off easily enough, but it does transfer a film of rubber all over the block, even the white parts. I carved a little on it and the film comes off fairly easily by pulling it up without damage to the block.

Here is the enlargement of the transfer printed and on the block:
On to transfer number three, the hanshita.

Transfering design to block with Studio Paper

It has been an experimenting year for me so I wanted to try out different methods of transfering image to block. I vary my own approach, depending on what my plan is with a certain image.
For multi-color woodblock prints, I almost always carve the key block and print on hanshita paper as many times as I will need color. For reduction blocks, it really doesn't matter so much; if my composition is complex and I need to work out things in Photoshop first, then I might use one of the methods below or simply transfer with tracing paper.

Most of my designs are drawn straight on the block with sumi ink. It really just depends on what print, how much detail, method, etc. But I wanted to add a few more methods to my arsenal, just in case. These three are very suitable for highly detailed work and for printouts from any printer.

Left to right, these are three printouts from my computer. First is Studio Paper, a transfer medium which I purchased online at http://www.imcclains.com/.

In the middle is iron-on t-shirt transfer for ink-jet prints, available at any office supply store.

Last is the hanshita paper, a tracing paper attached lightly to a tougher sheet. This paper goes through any printer and is availabe from the supplier above and also from the Baren Mall at http://www.barenforum.org/ click on Baren Mall from there.

I first cut the three printouts to size; I'm working on 4x6 shina blocks.

The Studio Paper, a waxy paper that leaves the ink from the ink-jet printer very "wet" and requires little pressure to transfer, gave me a very light printout, although the detail was fine enough.

I simply lined up the corner of the block and pressed down lightly with a "doorknob-baren". Any pressure implement will do. The paper is slick and the ink is still wet so care is needed to avoid blurring.
I checked as I went along to see how the transfer was coming along. The Studio Paper transfered quickly and cleanly with very little pressured.

Overall, I was impressed with the detail, although I would have liked the ink to be a tad darker on the block. I am transfering on bare blocks for this experiment and usually I would have tinted the blocks with walnut or gray ink to help later in carving.

Aside from the lightness of the transfer, the Studio Paper worked as advertised! I'm always a bit skeptical about these products but this one works.

Next I will try the iron-on stuff. Last picture is a close up of the detail from the studio paper transfer.